For centuries, the molcajete has been the heart of the traditional Mexican kitchen. This iconic Mexican mortar and pestle, carved from a single block of volcanic rock, is far more than a simple tool; it's a vessel of culture, flavor, and culinary tradition. While modern appliances promise speed, the molcajete offers something irreplaceable: depth of flavor and a tangible connection to history. This guide delves into the rich heritage of this essential cookware, explores its versatile uses beyond just making salsa, and provides a crucial, detailed tutorial on how to properly season a new molcajete—a step that is the secret to unlocking its true potential and ensuring a lifetime of delicious meals.
The Ancient History of the Molcajete: From Aztec Kitchens to Modern Homes
The story of the molcajete begins over 2000 years ago with Mesoamerican civilizations like the Aztecs and Mayans. The name itself comes from the Nahuatl words "molli" (sauce) and "caxitl" (bowl), literally meaning "sauce bowl." Crafted from basalt, a porous volcanic rock, these implements were used to grind corn for tortillas, crush spices, and prepare medicinal herbs. The rough, unglazed interior of the stone was perfect for pulverizing ingredients, releasing oils and flavors in a way that smooth surfaces could not. This ancient design has remained virtually unchanged, a testament to its perfect functionality. Each genuine handmade cookware piece is unique, bearing the marks of its artisan and the volcanic origin of its stone, making it a piece of culinary history you can hold in your hands.
Beyond Guacamole: The Versatile Uses of Your Molcajete
While famously used as the ultimate salsa bowl and guacamole bowl, the molcajete's utility is remarkably broad. Its primary function is grinding and crushing. The coarse texture of the volcanic rock efficiently breaks down hard spices like cumin seeds, peppercorns, and cloves, releasing fresher, more aromatic oils than pre-ground powders. It's ideal for making pastes—think rich, complex moles, vibrant chimichurri, or Thai-style curry pastes where you control every ingredient. You can use it to crush garlic and ginger into a fine pulp, mash avocados (where the slight texture from the stone is desirable), or even grind nuts for sauces or crusts. Unlike a food processor, which can bruise herbs and create a watery salsa, the molcajete's grinding action coaxes out flavors without destroying the cellular structure of fresh ingredients, resulting in salsas with superior texture and a more blended, rounded taste.
The Critical First Step: How to Season a New Molcajete
Every new volcanic rock mortar requires a critical process called "seasoning" or "curing." This is not optional; it serves several vital purposes. First, it removes any loose grit, stone dust, or small particles from the carving process that would otherwise end up in your food. Second, it fills the porous surface of the rock with starch and oil, creating a smoother, non-stick cooking surface and preventing the molcajete from absorbing the flavors and colors of your food. Skipping this step will result in gritty, stone-flavored dishes. Here is the traditional, foolproof method for seasoning your molcajete.
Step-by-Step Seasoning Guide
What You'll Need: Your new molcajete, the tejolote (pestle), dry white rice, garlic, and water.
Step 1: The Initial Scrub. Rinse the molcajete and tejolote thoroughly with warm water. Use a stiff-bristled brush (a new dish brush or a dedicated nail brush) to scrub every surface, inside and out. Do not use soap. Rinse until the water runs clear.
Step 2: Grind the Rice. Place a handful of uncooked, dry white rice in the bowl. Using the tejolote, grind the rice with firm, circular pressure for 5-10 minutes. The rice will turn into a gray, pasty powder as it absorbs the stone dust and fine grit. Discard this powder.
Step 3: Repeat. Repeat the rice grinding process 2-3 more times, or until the ground rice powder remains mostly white, indicating most of the loose particles are gone.
Step 4: The Garlic Seasoning. This step seals the pores and builds flavor. Grind 4-5 whole cloves of garlic into a smooth paste. Spread this paste all over the interior of the molcajete and the grinding end of the tejolote. Let it sit for 24 hours.
Step 5: The Final Rinse. After 24 hours, rinse the molcajete thoroughly with warm water. It is now seasoned and ready to use. Some traditions also involve grinding a batch of spices or corn as a final step, but the rice and garlic method is the most common and effective foundation.
Choosing an Authentic Molcajete: What to Look For
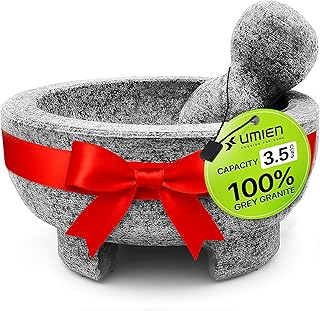
With the growing popularity of traditional Mexican kitchenware, many imitations exist. An authentic molcajete is always made from one of three types of volcanic rock: basalt, granite, or andesite. It should be heavy, with a rough, textured interior and a sturdy, three-legged base for stability. The grinding surface should be uneven and porous, not smooth. Beware of concrete or resin copies, which are lighter, have a uniform texture, and will not perform or season correctly. A genuine piece, like the Genuine Handmade Mexican Mortar and Pestle Set, is crafted by artisans, often bearing tool marks and natural variations that confirm its handmade origin and volcanic rock composition.
Caring for Your Culinary Heirloom
Proper care ensures your molcajete lasts for generations. Never use soap. The porous stone will absorb it and taint your food. Clean it immediately after use by scrubbing with hot water and a stiff brush. For stubborn residues, use coarse salt as a gentle abrasive. Always let it air-dry completely before storing to prevent mold. Over time, the seasoned surface will darken and develop a beautiful patina, a sign of its well-loved history. With proper seasoning and care, your molcajete will become a non-stick, flavor-enhancing workhorse that improves with age, transforming simple ingredients into extraordinary dishes with every grind.