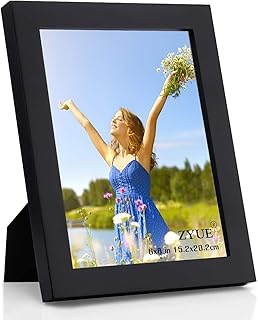
In the world of photo display, the 8x6 format holds a special place. It's a versatile size that bridges the gap between standard 4x6 prints and larger statement pieces, making it perfect for everything from family portraits to artistic photography. However, many people unknowingly make critical errors when displaying their cherished 8x6 photos, diminishing their visual impact and potentially damaging the images over time. As someone who has curated countless gallery walls and helped clients showcase their memories, I've identified the most common pitfalls. This guide will help you avoid these mistakes, ensuring your 8x6 picture frames look their absolute best, whether on a tabletop or mounted on the wall.
Mistake #1: Choosing the Wrong Frame Material for the Location
The first and most fundamental error is selecting a frame without considering its environment. A frame destined for a sunny living room has different requirements than one for a humid bathroom or a busy hallway. For high-traffic areas or homes with children and pets, the choice of glazing is paramount. While traditional glass offers clarity, it poses a significant safety risk if broken. This is where plexiglass frames shine, particularly for tabletop photo frames that are more prone to being knocked over. The polished plexiglass used in collections like the Galleria provides exceptional clarity that rivals glass, is lightweight, and, most importantly, is shatter-resistant. It protects your photos from accidental impacts without the danger of sharp fragments, making it a superior choice for versatile display in any room.
Mistake #2: Poor Grouping and Spacing in Multi-Pack Displays
Purchasing a multi-pack frame set is a smart, cost-effective way to create a cohesive display. However, the common mistake is haphazardly arranging them. A set of five frames, like the Americanflat 6x8 set from the Galleria Collection, offers incredible potential for storytelling. The error lies in treating each frame as an isolated island. For a dynamic wall gallery, maintain consistent spacing between frames—typically 2 to 3 inches works well for this size. Create visual flow by aligning the top or bottom edges, or establish a central axis line. For a tabletop arrangement, vary the heights by using some frames upright and others in landscape orientation, or layer them slightly for depth. A unified color, like a sleek black picture frame, helps tie different photos together into a single, intentional statement.
Mistake #3: Ignoring Matting and Cropping for the 8x6 Aspect Ratio
The 8x6 aspect ratio (4:3) is different from the common 8x10 (4:5) or 11x14 (11:14). A critical mistake is forcing a photo cropped for one ratio into another, resulting in awkward white space or important parts of the image being cut off. If your photo isn't naturally 6x8 inches, you have two professional options. First, use a mat. A custom-cut mat with a 6x8 window can beautifully center a smaller 4x6 or 5x7 photo, adding a professional border that enhances the art. Second, if you're printing digitally, always crop your image to a 4:3 ratio before sending it to the printer. This ensures the composition you intended fills the entire frame. A quality 6x8 frame is designed to highlight this perfect fit, so give it the correctly proportioned photo it deserves.
Mistake #4: Incorrect Lighting and Placement That Causes Damage
Where and how you place your frames can preserve or destroy your photos. The most damaging mistake is direct sunlight. UV rays will fade and yellow even the highest-quality prints in a matter of years. Never place a wall display frame directly opposite a south-facing window. For tabletop frames, keep them away from spots where sunbeams land during the day. Similarly, avoid placing frames directly above heat sources like radiators or fireplaces, as heat and humidity can cause photos to warp or adhesive to fail. Consider the viewing angle, too. A tabletop frame should be placed where it can be seen comfortably from a seated position, not hidden behind decor. Thoughtful placement protects your memories and maximizes their enjoyment.
Mistake #5: Overlooking the Backing and Hanging Hardware
Many people focus solely on the front of the frame and neglect the back, which is a recipe for frustration and potential damage. Flimsy cardboard backing can bend over time, allowing dust and moisture to seep in and causing the photo to buckle. Quality frames, such as those in a curated gallery collection, use sturdy, acid-free backing board. This material is essential for archival purposes, as it prevents acids from migrating into your photo and causing deterioration. Secondly, using the wrong hanging hardware for the wall type is a common error. For drywall, a simple nail often isn't enough for a multi-frame display. Use appropriate wall anchors for the weight. For a cohesive set of five, consider using a picture-hanging system with a rail and wires for easy, level adjustment. Secure backing and proper hardware ensure your display stays safe, straight, and beautiful for years to come.
Building Your Perfect 8x6 Gallery: A Step-by-Step Approach
Now that you know what to avoid, let's build a flawless display. Start by gathering your five best 8x6 photos with a connecting theme—a color story, a family vacation, or black-and-white portraits. Lay them on the floor and experiment with arrangements: a symmetrical grid, a staggered vertical line, or a clustered collage. Once satisfied, trace the frames on craft paper, cut out the templates, and tape them to the wall to finalize spacing. When hanging, start from the center and work outwards, using a level religiously. For a tabletop, create a mini vignette on a console or shelf, mixing the frames with a small plant or decorative object for scale. The goal is to create a focal point that tells your story without the clutter and errors that undermine so many displays.
Conclusion: Display with Confidence
Displaying your photos in an 8x6 format should be a joyful, creative process, not a source of frustration. By avoiding these five common mistakes—choosing poor materials, arranging poorly, ignoring aspect ratios, placing in harmful light, and using weak hardware—you elevate simple photo display into curated art. Investing in a well-designed set, paying attention to the details of matting and placement, and using protective materials like polished plexiglass will ensure your memories are showcased beautifully and preserved for the long term. Remember, the right frame doesn't just hold a picture; it honors the moment inside it.